Many times it is hard to look at a pattern and envision how you could modify it to get a different look. This is especially true for those sewists who consider themselves beginners, heck even I struggle with modifying patterns sometimes.
Today I am going to show you how I made the Montlake tee into a tunic with just a couple easy steps, to save you from having to try and figure it out.
This is the first of many modifications I have planned over the next few weeks to help you see that Montlake is so much more than just a simple tee.
When I was drafting this pattern and decided on the swingy hem I instantly imagined it as a tunic to wear with straight leg jeans and converse, which seems to be my go to outfit lately. While the winter here in Seattle has been reasonably warm it has definitely been grey and wet so a cozy tunic is perfection.

Looking through my fabric stash I found this green terry from Indiesew that was originally meant for something else, but I just couldn’t get it out of my mind as the perfect Montlake tunic. How I ever thought it should be something else I have no idea, it was meant to be made into a Montlake tunic. Just picture this top with some leggings and boots!

The neckline on this tunic is quite a bit lower than any other Montlake I have made and that is entirely due to the fabric. This terry has a really open weave and not a lot of recovery so it really relaxed out once it was sewn up. This is definitely not a bad thing and I probably could have gotten away with making it a size smaller. The only thing that matter to me was that it was cozy and cozy it is.
I was going for 3/4 length but due to the amount of fabric I had it ended up being more in between elbow and 3/4. I sort of love it though!

The terry is a fun version but I have also made a tunic out of some stripe jersey that was great with leggings as well. Any fabric you would use to make a Montlake can definitely be used to make a tunic. The only thing to be careful with when using terry is that the neckband might need to be cut to a different length. I talk about different neckband lengths in this post.
Okay lets get down to the nitty gritty of making your Montlake tee into a tunic. It’s really not that nitty gritty, in fact it is actually super easy.
The first thing to know is that you are not going to be working from the lengthen/shorten line. While this may work for other patterns, the problem you run into by doing this is that the bottom of the shirt that is meant to be hitting you at the hip is now going to be hitting you below that point leaving you with a tight tunic around your hips. Not that I did this once and realized my mistake.

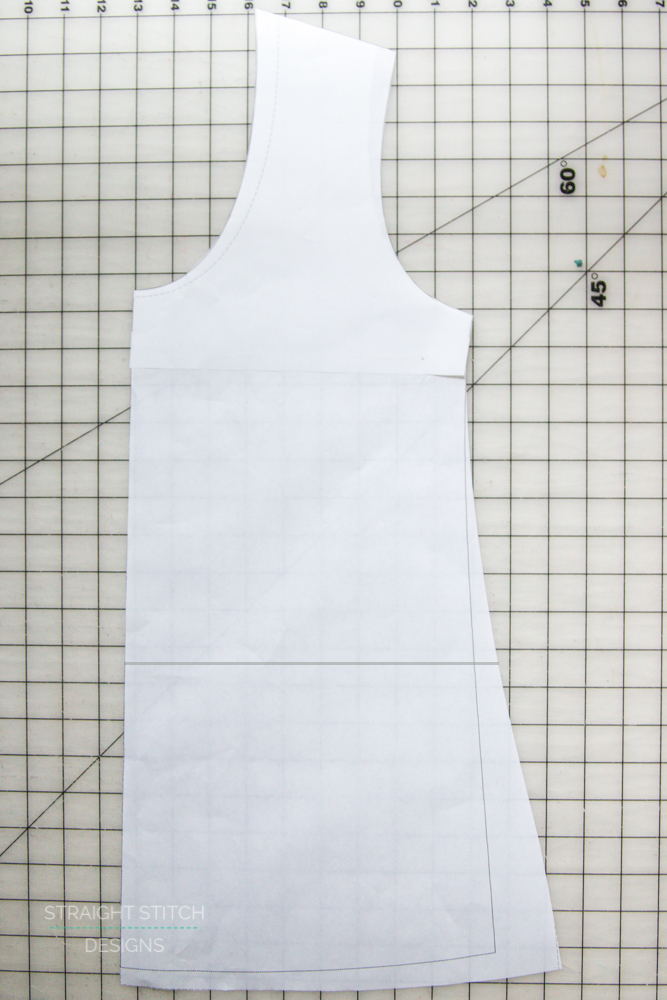
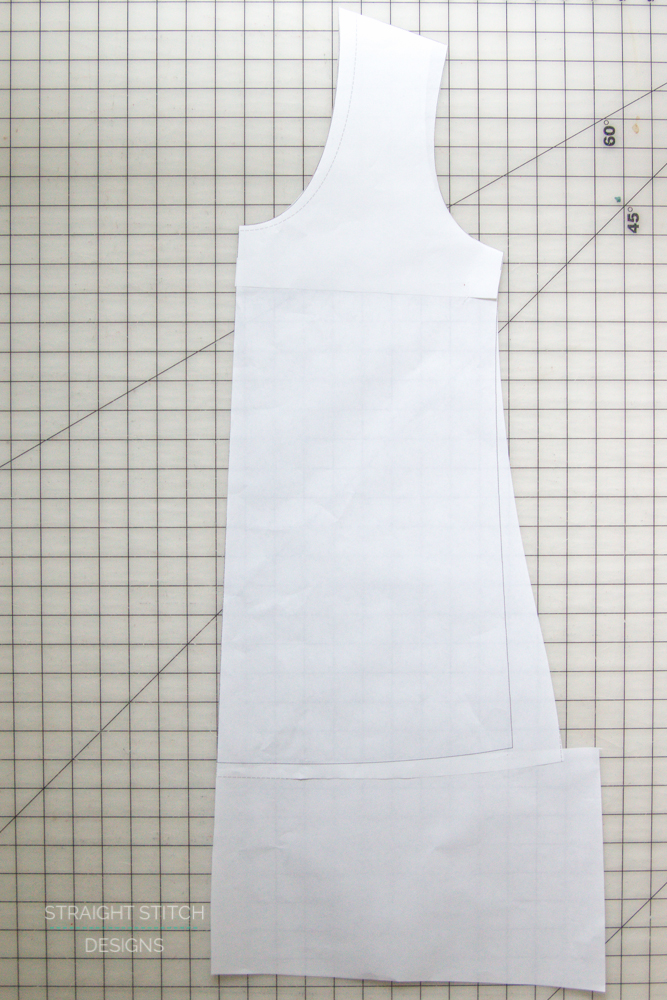
- Take your front pattern piece and tape a big piece of paper onto the bottom. Make sure it extends beyond the outside seam of the pattern piece, we are going to be extending the curve of the side seam all the way to the new bottom hem.

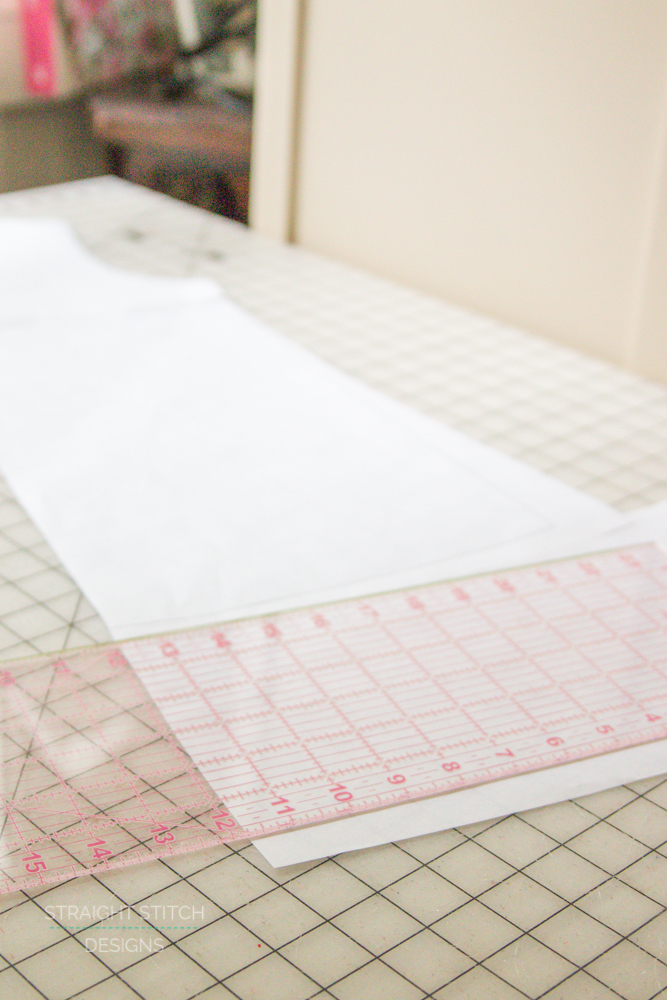
2. The amount you extend your pattern pieces will be different for every person. I am nearly 5’10” so I needed to add 6 inches to give me enough coverage over my bum. But you may not need that much. The easiest way to do this is put on your Montlake tee and have someone hold a measuring tape at the hem and measure down to where you would like the tunic to hit.
Once you have determined the amount you would like to extend your tunic mark a straight line all the way across the paper you added.

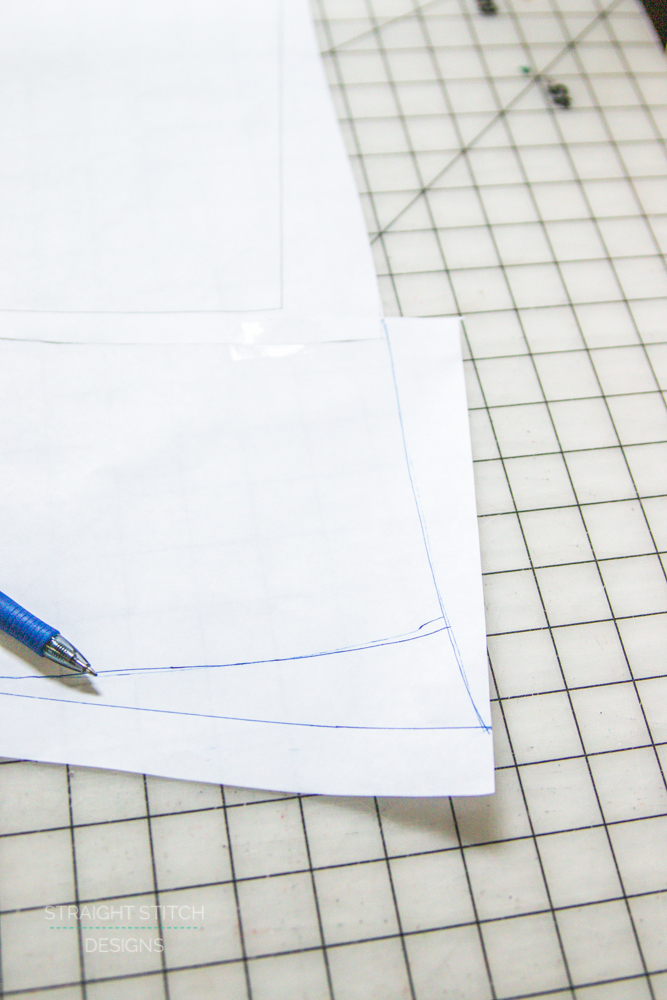
3. Using a pen just extend the side seam all the way down to your new line. Make sure to try and follow the same angle of the original pattern, this will ensure you have enough ease at the hips.
You may have noticed that the bottom hem of the pattern piece is not completely straight across. The easiest way to replicate this is to just eyeball the curve at the bottom, it doesn’t have to be perfect. I promise!

4. Cut out your new pattern piece making sure to cut along the curved bottom hem. Then repeat the above process with your back piece! Ta Da you made a Montlake tee into a tunic!

I told you it was surprisingly easy!
If you haven’t picked up your copy of the Montlake pattern you can find it here. Make sure to come back tomorrow when I will be sharing an alternative neckband options for the pattern to give you a different finished look. Don’t forget to share your versions of the pattern with #montlaketee and tag me @straightstitchdesigns so I can see what you are making!


Thanks for this – not only will I use it for Montlake, but many other times for my Granddaughters who love tunics!