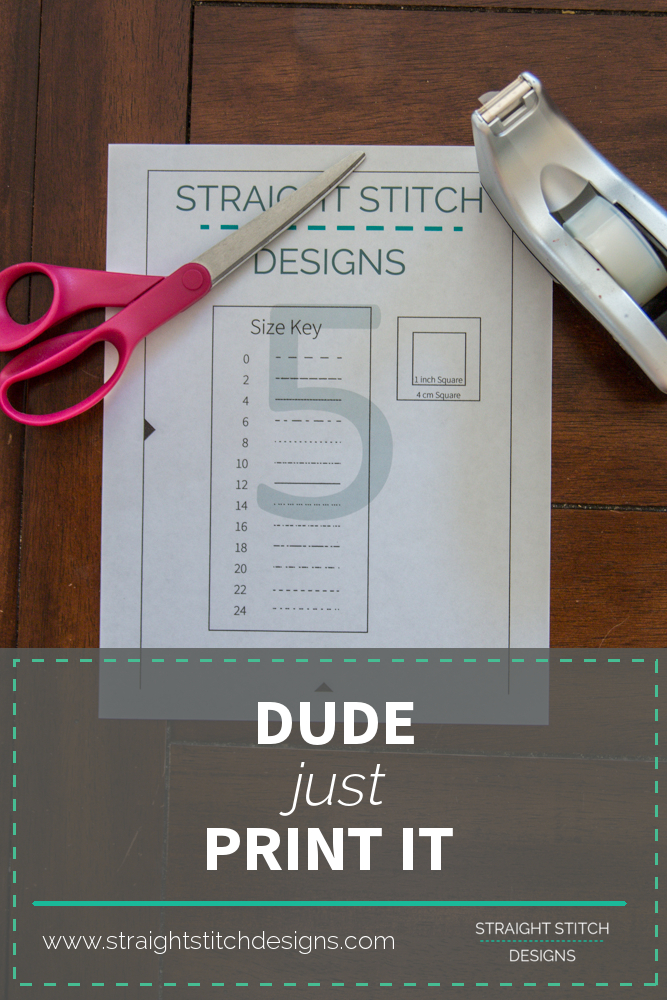
Today was a huge aha moment for me, as Oprah would say. No it wasn’t about the perfect pattern design or some new program that will revolutionize the indie sewing pattern world, it was something much more vital to pdf patterns.
I figured out how to print my pdf patterns on my HP printer without the bottom 1/4″ being cut off!! Super exciting right?!
What this means is that for the last few years I pretty much spend my time yelling some variation of “dude just print it” on the daily at my printer. Sure I learned to live with it but it always bothered me that I couldn’t figure out a simple fix to just make my printer and computer cooperate. That was until today when I decided I was going to figure it out once and for all. And I did it!
Want to hear what I did? You are going to laugh like I did at the super simple fix that I could have figured out 3 years ago and saved me a bunch of hassle. All you have to do is change your page source to A4. Thats it. You still put letter sized paper in your printer but trick the printer into thinking you have A4 paper so it won’t cut the bottom line of your pdf off.
Now you are probably wondering if this works for every pdf pattern and what I will say is that I have tried it on my patterns and two other designers patterns and it works. But what I recommend you do is print the page of the pattern that has the measurement boxes and make sure they are correct. If that is right then you are good to go.
For those of you who aren’t totally familiar with how to make these types of changes within your printer dialog I have a quick step by step guide on making this change when you print a pdf pattern.
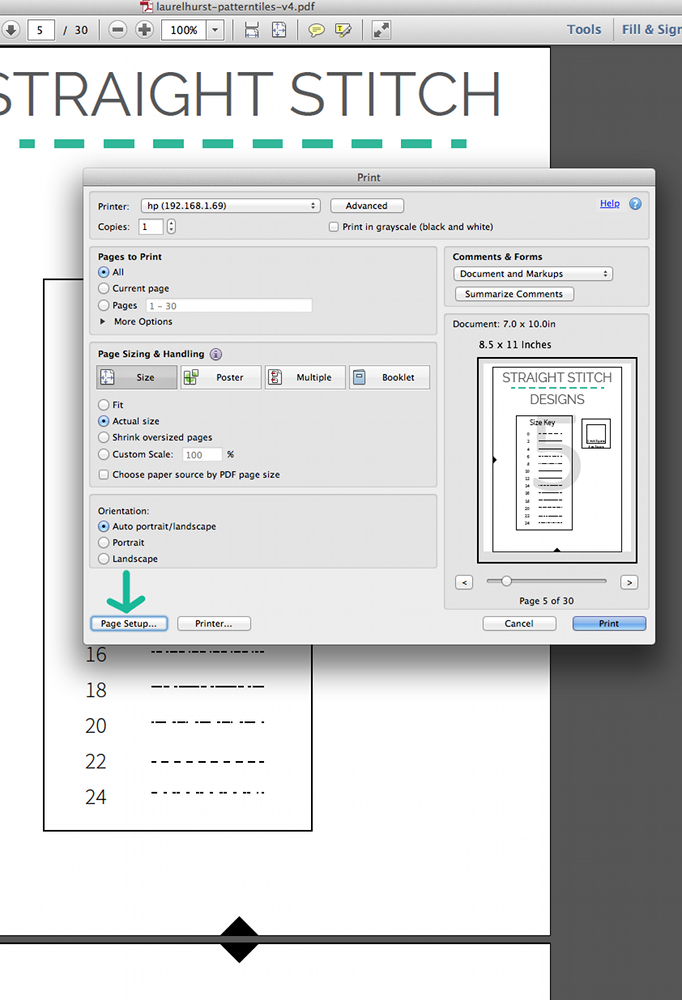
For the first step you simple select print either in the menu or by using the printer icon at the top. Once your print dialog come up you need to click on Page Setup in the bottom left corner. In the interest of this guide I will be using the steps for Adobe Reader, but they should be similar in other programs.
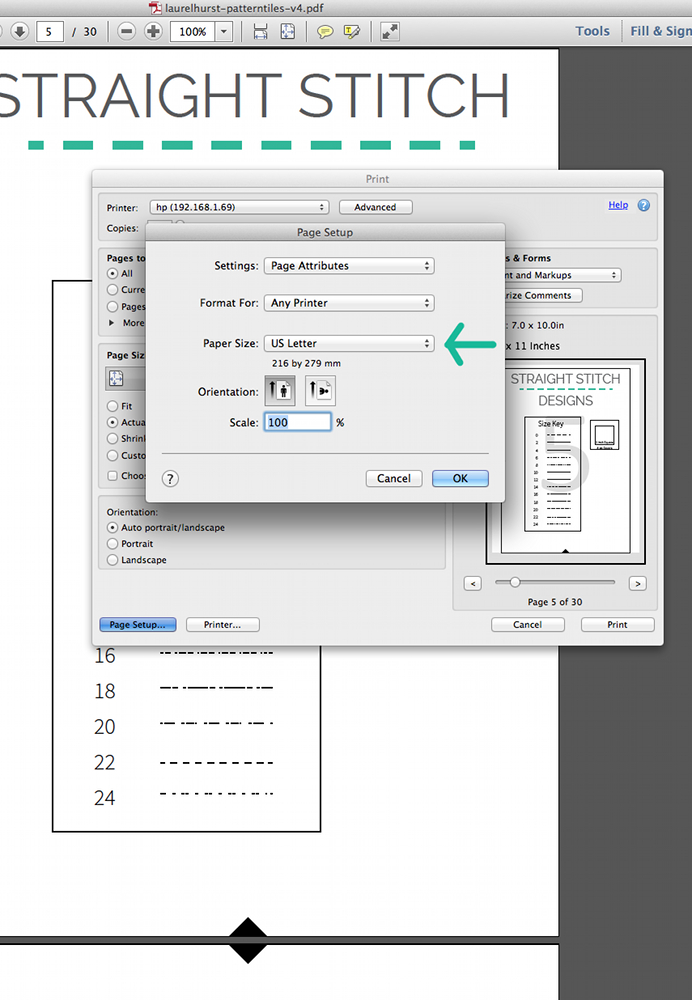
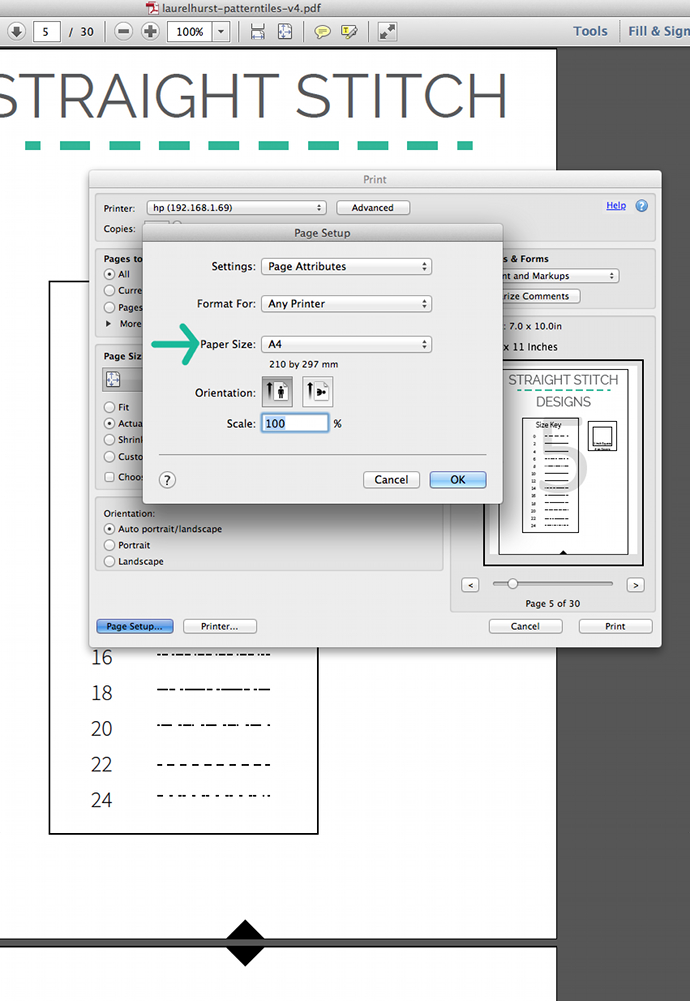
Once the page setup dialog box has come up you will be clicking on the paper size drop down menu.
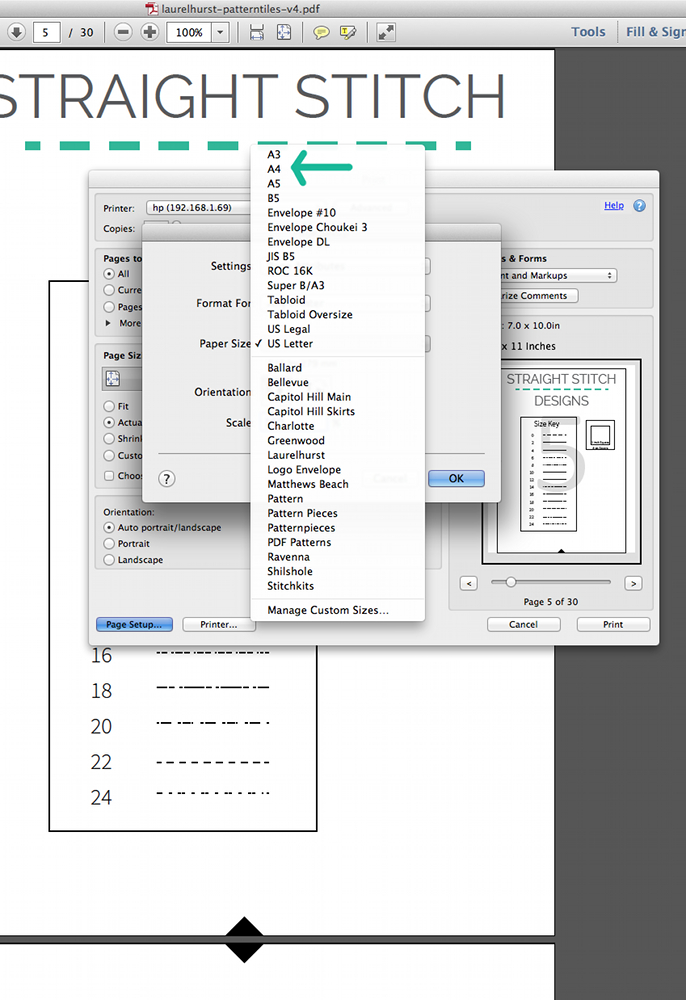
Scroll up until you see A4 listed and click on it. (Ignore all of the custom printer settings labeled with my pattern names on the bottom that is for printing on my large format printer)
You will now see that your selected page size is A4. Click okay to take you back to the print dialog box.
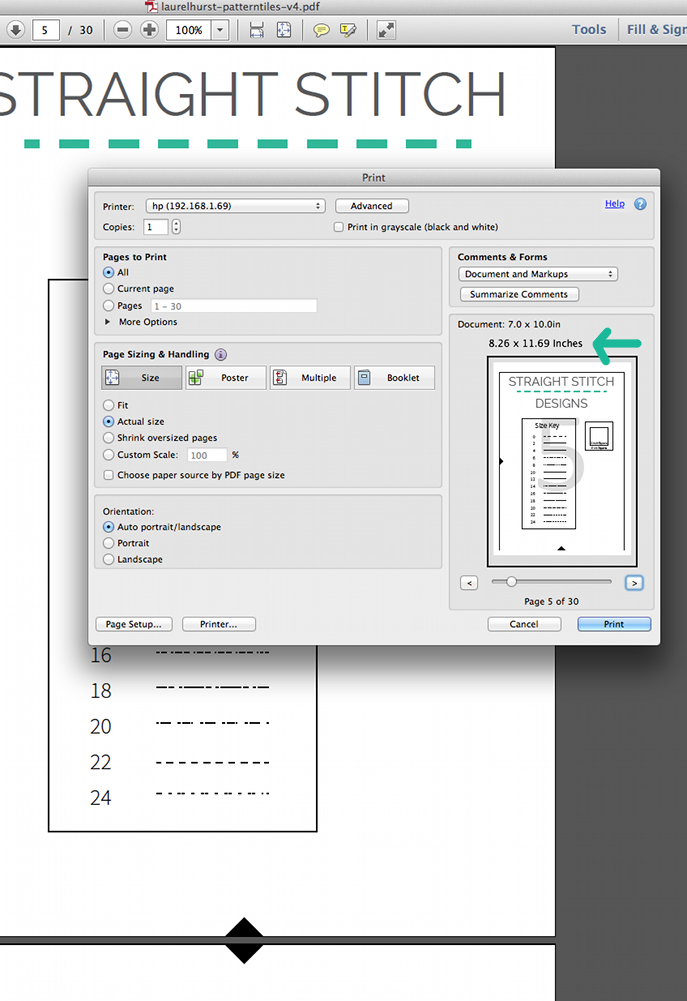
For the last step all you need to do is make sure that the paper measurements are set for A4 which is 8.26 x11.69 inches. Hit print and watch the entire pattern piece print!
Hopefully this has helped you fix any similar printing issues you might be having.

