In a perfect world you wouldn’t have to think about stretch percentages and fabric content when working with knits. You could grab any knit from your stash and it would work the same as all the other knits when making the same pattern.
Unfortunately that isn’t the case, many times you have to make some adjustments to a pattern even when the fabric you are working with is one of the listed fabrics. What it comes down to is that all knits are not created equal.
Take my Greenwood pattern for instance, this pattern is for a great basic knit tank top. The binding method is one that I have thoroughly enjoyed perfecting and I love the final product, it looks pretty darn professional if I do say so myself. It wasn’t until I had made like a dozen of these tanks after the release that I noticed each one was fitting me differently in the armscye, which is something we spent a lot of time in testing getting right, so the culprit must be the fabric.
So today I am going to discuss how to work with a pattern to get the correct fit for neckbands and other bindings and bands. As pattern designers we can anticipate many things but sometimes as the consumer it takes a bit of fiddling with a fabric to get what will work best.
As I mentioned above I noticed the difference in the Greenwood when working with different fabrics. When sewing it up in a Cotton Lycra I find the armscye to be higher on my underarm. I don’t mind it but it is definitely a tighter fit.
I then sewed up the exact same pattern but this time in a lightweight jersey and the fit was far more relaxed through the armsyce. Nothing changed between these two tank tops other than the fabric.
So this is where you as the sewist comes in and you have to decide if you want to make changes to the length of the binding to get a better fit or just leave it as written. For those that might not be comfortable straying from a pattern I hope this post better explains how the binding lengths are determined and the easy adjustments you can make to achieve a better fit for the fabric you are working with.
Okay so bear with me I am going to get a little technical here but it will all make sense in a moment.
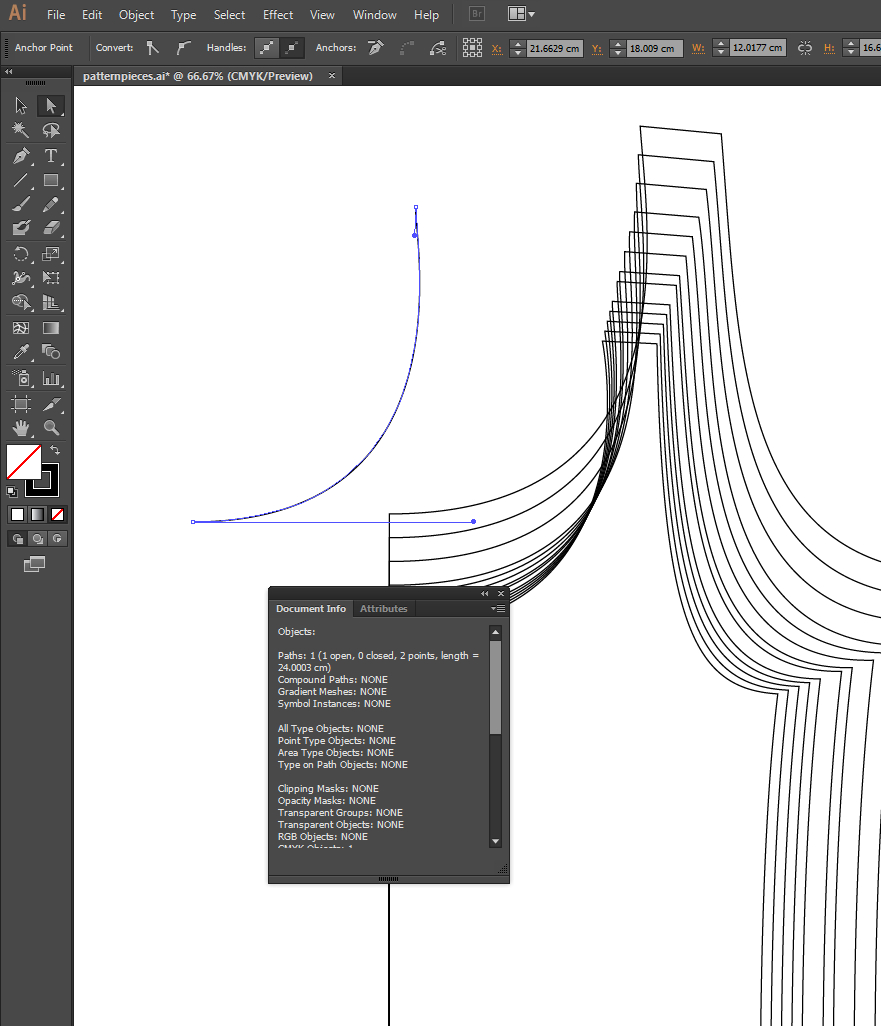
When drafting a pattern I start by determining the length of binding needed by taking the measurement of the armscye as in the picture. I then multiply it by two since this pattern piece is only half the length of the armscye. Then I take that full measurement which in this case is 48 cm and I multiply it by .85 giving me 85% off the total length which is 40.8cm or 16 inches. As you know with neckbands and binding they need to be slightly smaller than the opening so that they lay against your body instead of sticking out, I settled on 85% when I started and it has worked for me with all of my patterns. Other pattern designers go as high as 90%, it’s just a matter of what the designer settled on.
Now that you have this knowledge you can see how the measurement of 85% of the total length might not work for every fabric. Now I am going to explain what to do with a sewing a pattern such as the Greenwood to get the perfect fit.
If you know your fabric has a good amount of stretch you can start with the pattern as written. The main thing to remember when working with neckbands and binding is to start by basting it on. This will save you so much time if you discover it is too short and now you may have to unpick a bunch of serger seams, and I think we can all agree ain’t nobody got time for that.
If you strike gold and it fits great you are left with a nice flat neckband and you can now do a happy dance because it looks perfect.
But we have all been there when the gold was not to be found and all you are left with is a wavy neckband because you had to stretch and stretch to make it fit.
Confession time! I can be a bit of a lazy sewist so depending on how bad it is I may just live with it. But that is usually because I didn’t listen to my own advice and baste it first and just the thought of unpicking the serger stitches sounds like torture.
But we are going for a nice fitting neckband or bindings that lays flat and doesn’t pull so I recommend removing the band and adjusting the fit. Once you do this a few times you will have a better knowledge of how different fabrics stretch and it will get easier to make these adjustments from the start, but for now lets recut our neckband by adding 1 inch.
Sew that bad boy into your neckband with a basting stitch and check the fit, it’s amazing what a difference an inch makes.
Many times you are going to be perfect with an inch which is the difference of 85% and 90% for the Greenwood pattern. Look at it as a process of learning something new about the fabric you are working with and try again if that doesn’t work. Or you can just topstitch it and call it a day because no one is perfect and that goes for ready to wear clothes too!


Interesting topic!!! Have you made one in mid-weight rayon or bamboo yet? I made two which were ended up unwearably sloppy under the arm because the binding stretched out at least 4 inches with the serging and topstitching, even when I cranked the differential feed on the serger! I made them pj-wearable by taking a bit tuck in the underarm side seam, but of course that affects the fit over the bust… I guess it’s just not an ideal technique for spongy knits… I had better luck with a classic folded band finish.
I am so sorry to hear you had difficulties with the binding. I have made them in cotton lycra, jersey and sweater knit. When I serged the bands on I didn’t make any changes to my settings and just top stitched with a zig zag stitch set at 1.5 and 3.5. I know some of the testers in the group had some issues with wavy stretched out bands but most of that was cleared up after watching the video of how I do the binding. A few of the testers decided to do a traditional band finish so that is always an option. I am always here to help if you have any additional questions.
Thanks!
You are such a smart cookie, thanks for this resource! I’m sharing it with all my capsule wardrobe sew along ladies 🙂 XOXO
Quick follow-up question – when you are taking the measurement of the armscye, do you remove seam allowances? Or at least the one at the shoulder seam?
Becca, all of these measurements are done before adding seam allowance to the whole pattern.